. . . . S T A T U S
Mood : ok lu-
Tiredness : 70%
It's Saturday. I worked only 2 and a half hours and got back home. *tired*
Today, we are going to continue the post on Malacca Trip.
I've made the content as a quick reference to all episodes of Malacca Trip
MALACCA TRIP
CONTENT
MALACCA TRIP
Episode 3 : Making Batik Cake
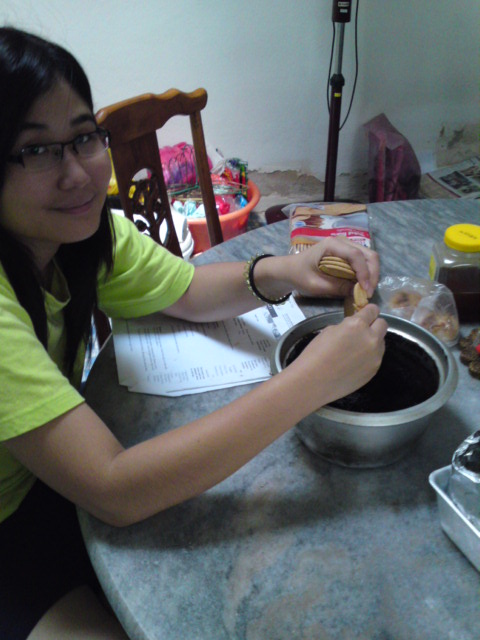
One fine day, Mom decided to do baking. Well, it's not R E A L L Y baking cuz we don't even use the oven. Anyway, that day, we made Batik Cake. It's a kind of Malay cake which is really tasty and easy to make.
This post is also specially made for Wei Wen since she has requested for this recipe long time ago. So sorry that I didn't manage to give it to you earlier. Here's a post with photos on how to do Batik Cake step by step.
I checked on the Internet just now, Batik Cake is also known as chocolate fudge cake? Well, enjoy the post.
In my campus, the cafe sells this cake too. They sell it at RM 0.50 per piece which I think is pretty expensive. The ingredients are cheap and it is easy to make. Get your apron and start baking! ; )
.
.
.
How does the cake gonna look like?
Most people are interested to look at the outcome before looking at the steps.

Horrible cutting by me
It tastes good, however.
.
.
.
RECIPE (INGREDIENTS)
I snapped this with my C905 document mode
Clear?
NOTE: Ignore the steps in this paper cuz I will explain that in details in a meanwhile.

For those who has difficulty reading it from the picture:
INGREDIENTS:
175 gm butter
4 large eggs (egg yolk + egg white)
300 gm condensed milk
40 gm Nestum (oat)
110 gm Milo powder (normal Milo)
15 gm cocoa powder
125 ml water
280 gm Marie biscuits (break into pieces)
REMARKS:
We really hate recipes that are not honest with its ingredients, don't we?
This recipe that is kept in my Mom's Recipes Book is guaranteed to be genuine and safe to follow.
Btw, Marie biscuits can be any type as long as it is that kind of round biscuit with "MARIE" on its cover. It's OK to use either the light brown or dark brown or semi brown's one.
Also, this recipe is good because the measurements are metric measurements. I seriously dislike American measuring (i.e. 3 cups, I have VARIOUS sizes of cups at homeeeeee).
EXTRA from me :
Some people may desire to have a look at what they need before deciding to do or not.
UTENSILS
Electric mixer
Fork
Spoon
Bowl
Scissors
Aluminium foil
Gas stove
Stainless steel container (any will do)
Kitchen scales (to measure ingredients)
Pot (I'm using the unwanted rice cooker pot)
NOTE: Get round container if you intend to make Batik cake as a birthday cake. ^^
.
.
.
STEPS
Follow me step by step, I am sure you won't be left back.
Ready???
Here we go!
1. Measure and prepare the ingredients.

I wanted to show the transparent measurements on the measuring cylinder.
Too bad, it's too bad for reading.
Prepare 125 water (normal drinking water in room tempearture).

Cocoa powder
It's OK to add more cocoa powder actually.
The more you add, the darker your cake gonna look like.

Nestum oat
Just oat, normal oat.

Condensed milk.
The milk we use to make Milo or coffee.

That's how kitchen scales look like.

In case you don't know how to measure liquid form of ingredient?
This is lame but it may be useful for somebody outside, idk?
Make sure you have all your ingredients around.
We don't want to mess everything up half way, mm hmmm??
Now, we are going to start the work!
2. Beat the butter.

Get your electric mixer ready, beat the butter till light and creamy (approximately about 15 minutes).

Half way done, continue beating...
3. Beat in the eggs.

Crack and beat the egg one by one at a time into the butter mixture.

Take 5 for my mini little electric mixer

Let's get back to work little mixer!
Second egg entering to butter mixture.

Caution : DO NOT beat the mixture while you are putting in the egg.
This is common sense I know but it's just a reminder.
You are going to mess up your kitchen if you beat while putting in egg.

Continue beating.
Mix the butter and egg into a well-blended mixture.
4. Pour in oat and milk, and continue beating the mixture.

Stop your electric mixer for a moment and pour in the oat you have measured earlier.

Then, pour in the condensed milk carefully.
It's sticky, so make sure you don't let the milk drip on the table or the side of the pot.
Then, continue beating the mixture till everything is well-blended.
5. Pour in cocoa powder and mix with a spoon.

After pouring in the cocoa powder,
use a spoon (or spoon + mixers WITHOUT electricity flowing) to mix and fold the cocoa powder between and within the mixture well.

Boyfriend mixing the mixture.
Yes, you don't eat free at my house.
You gotta work! =P
Use the mixers like how is shown in the picture above.
That's what I meant by WITHOUT electricity.
Do it manually.

He stirred it and didn't pause to let me have a snap.
That's why the photo looks a little blurrish.

Oh no-no, I hate this expression of his which is his favourite. X.X

I wonder if this is his first experience doing cake?
6. Pour in the Milo powder and continue stirring the mixture.

Mom handling the hardened Milo powder. =X

The a-little-hardened Milo =X

Going to the kitchen scales.

Then enter the mixture.

Pour in the Milo powder you have measured earlier and continue stirring it well.
7. Pour in water.

Pour in the water slowly into the mixture.

Now the mixture is a little soft.
Stir carefully.
Make sure everything blends well together.
8. Get your Marie biscuits ready.


This is Marie biscuits packaging fyi.
Round biscuits with MARIE printed on its packaging.
It's cheap and found almost in every shopping centers.
You don't ask me WHY we need to use MARIE and only MARIE.
= / Cuz I have never tried other type of biscuits.
9. Clean the side of the pot.

Clean the side of the pot using the spoon.
We are going to give it some heat-up.

Very seriously doing his work.
Hehehe.. I'm monitoring!
- - - - -
ADVERTISEMENT
- - - - -

Take 5, snap photo, ADVERTISEMENT~

Me cleaning up the mixer from the mixture.

Alien look. x.O?

I'm the photographer.
I do work too. =P

Ka-chak ka-chak!
Mom and boyfriend. <3
- - - - - -
End of ADVERTISEMENT
- - - - - -
10. Cook the mixture on the stove.

Get the mixers out.
Now, we use the spoon only to stir the mixture which is heated with low/medium fire.

Don't leave your mixture without stirring.
Your hard work will be gone if so.
Stir it from time to time.

Mom loves camera. @@
"Heat it for about 10-15 minutes."

Waiting patiently...
11. Check the mixture.

Check the mixture.

It should look something like this.
Sticky look.
Then, switch off the stove fire.
12. Cool the pot of mixture under the fan.
No pictures but it is understood, cool it under fan.
13. Prepare the aluminium foil.

While waiting for the mixture to cool down, prepare the aluminium foil.
The scissors is used to cut the aluminium foil.

Get a container and measure it well.

Adjust...


Adjust the aluminium foil according to the container's shape.
You don't want a crooked shape cake later.
14. Break the cookies.
Break the cookies into the mixture.
Caution : Make sure the mixture has cooled down before putting in the biscuits.

How to break it?
Just break it = = "
Children are best at this.

The size is not restricted.
By using common sense, you don't throw in the whole big round biscuit into the mixture.
= = "
15. Stir and fold the mixture.

This is how it's gonna look like after stirring the biscuit and the mixture.
Don't INTENTIONALLY break the biscuits by stirring it hard.
16. Pour them into the container.

Pour them into the container nicely with a spoon.

Almost there...

Ta-daaaaa...
17. Press them hard.

Now, use the spoon's flat surface to press on the mixture.
This is to make the cake not too spongy but "solid" = = " bad description.
In short, just press it with a little pressure until everything is flat.
18. Almost there....!!

Proudly, he presented the cake that he took part in baking it.

Cover the cake with the aluminium foil.
19. Bring it into the refrigerator.

Enter the refrigerator..
Don't be surprised to see so many facial/hair products on top of my refrigerator.
Those are NOT mine.
It belongs to the boys in my family.
= = " They are more vain than me.
20. Serve when it is chill and hardened.
The steps are not that complicated once you have mastered it well.
I'm breaking it to so many steps so that you are able to follow step by step.
I hope that I don't make you confuse.
Have fun baking at home!
It's definitely a great experience for he and I. ; ) xoxo


0 comments:
Post a Comment